

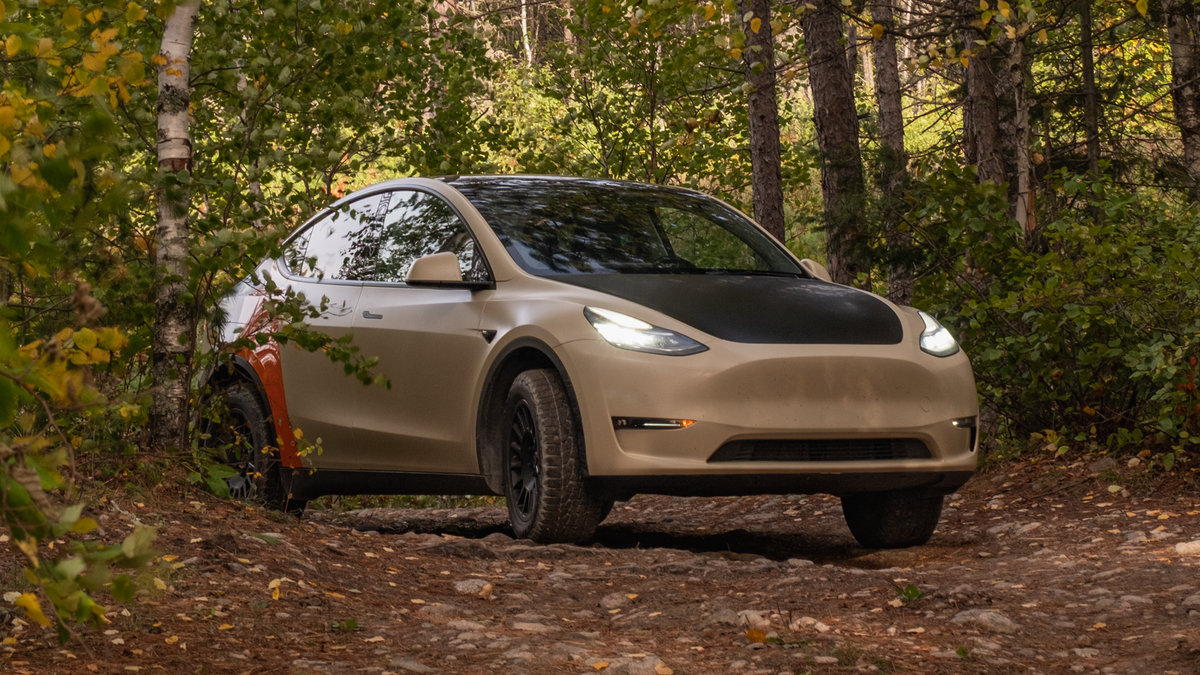
The Model Y Expedition Project is our giveaway build: a Tesla Model Y set up as a daily driver that can take a trail to a campsite and have some serious fun off-road. So far we've lifted it, run a range test before and after the lift and kitted out the interior. This episode, we finish the hardware and put the wrap on.
During the lift and range test video, we heard a clunk from the front end. It got worse afterward. We had our own ideas about what was worn, but we wanted to replace the right parts, not guess. So we took it to a local mechanic for an inspection before ordering anything.
Here's what this episode covers:
- New upper and lower control arms on both sides, plus a wheel bearing
- A heavy-duty skid plate swap
- A stock vs. Method wheel and tire weigh-in
- The hitch we ordered (and didn't need)
- Bodywork, then a full color-change wrap with Defense+ Matte PPF over top
Fixing the clunk: control arms, bearing and skid plate
The mechanic's recommended that we replace the bushings on both upper and both lower control arms and one wheel bearing. That's four control arms and a bearing, so we ordered all of it and got to work.

This is also where we introduce the newest member of the Drive Protected team, Joe. Joe's a car guy, and suspension is right in his wheelhouse.
To reach the control arms, the factory skid plate has to come off. Since it was coming off anyway, this was perfect timing to install a heavier-duty skid plate from Tesloid.

With the new arms and bearing in, we took it for a test drive. The clunk is gone and the front end is quiet again.
Stock vs. Method: the weigh-in
The new setup is 6 lb heavier per corner than stock. Before mounting the Method wheels, we put one corner of each setup on the scale.
|
|
Stock |
Aftermarket |
|---|---|---|
|
Wheel |
Factory 19 x 8.5 in |
Method MR707, 18 x 8.5 in |
|
Tire |
255/45R19 winter (came with the car) |
Falken Wildpeak 255/55R18 |
|
Weight per corner |
56 lb |
62 lb |

We dropped an inch of wheel diameter and added sidewall to make up the difference. The goal is compliance: taller sidewalls plus the softer suspension should soak up rough terrain better on the way to camp.
The open question is range. Four corners at 6lb each, plus a more aggressive tread, is a real change. After the lift, our range test moved only a few kilometres. We'll run it again on these wheels and tires and share the numbers.
The hitch we didn't need
Our hitch showed up just in time, so we pulled the rear bumper to install it. Behind the bumper: a factory hitch, already there.
We should have checked first but oh well. We popped out the hitch cover, connected the trailer wiring that was sitting there unplugged, and put the bumper back on. The car is now ready to tow if the next owner needs it.
With the suspension, skid plate, wheels and tires done, we took it for its first drive on the Methods. Then it was time for the wrap.
The wrap: sand, matte black and blaze orange
The final look is three finishes working together: matte sand, matte black and gloss orange.
Prep first
We found a few spots on the lower body where paint was flaking, plus some stone chips. Film shows what's underneath it, so those had to be fixed before anything went on.
Joe handled the bodywork. He razor-bladed the high spots down to level them out, then built the low spots back up with primer. While he worked on the front, we wrapped from the back so nobody was waiting.
Bumper off for the sensors
To wrap the rear bumper properly, we took it off. A couple of bolts up top and a few underneath, and it comes free. That let us pull the parking sensors and their gaskets so the film could wrap fully into the openings. Each sensor was wrapped separately, and new gaskets went in on reassembly.

The materials
Graphic Mart sponsored the color-change vinyl for this build, all from Arlon:
- Gloss sand brown (main body)
- Matte black (rear quarter panels and lower accents) [CONFIRM: full list of black panels]
- Gloss orange (accent stripe)
The body started as gloss sand. We wanted more contrast, so we laid Defense+ Matte PPF over the sand panels. That turned the sand matte and gave the panels the same protection as any of our full kits. The result: matte sand and matte black, with the gloss orange as the one thing that pops.

Matte PPF over a color-change wrap does two jobs: it changes the finish and protects the vinyl from rock chips and scratches. Defense+ is 8 mil, self-healing and backed by a 10-year warranty.
Thanks to Graphic Mart for supplying the vinyl. If you need any of these films, check them out. Matte or clear paint protection film kits can be found here.
What's next, and how to win this Model Y
The build is done. Now we use it for what it was built for: a camping trip, some trails and some real-world miles. That's the next episode.
You can win this car. Every $10 you spend at driveprotected.com earns one entry, on any product. Entries close November 30, and Black Friday weekend (November 26–30) runs at 10x entries.
|
Prize |
Choice |
|---|---|
|
Grand prize |
The Model Y Expedition Project build, or $20,000 cash |
|
Second prize |
$5,000 cash |
|
Third prize |
Tesla charger, or $500 cash |
Enter now by making a purchase on this site.
Subscribe on YouTube so you catch the camping episode and the rest of our series.
Share:
Road To A Million Ep. 2 - Dawson City, Yukon