
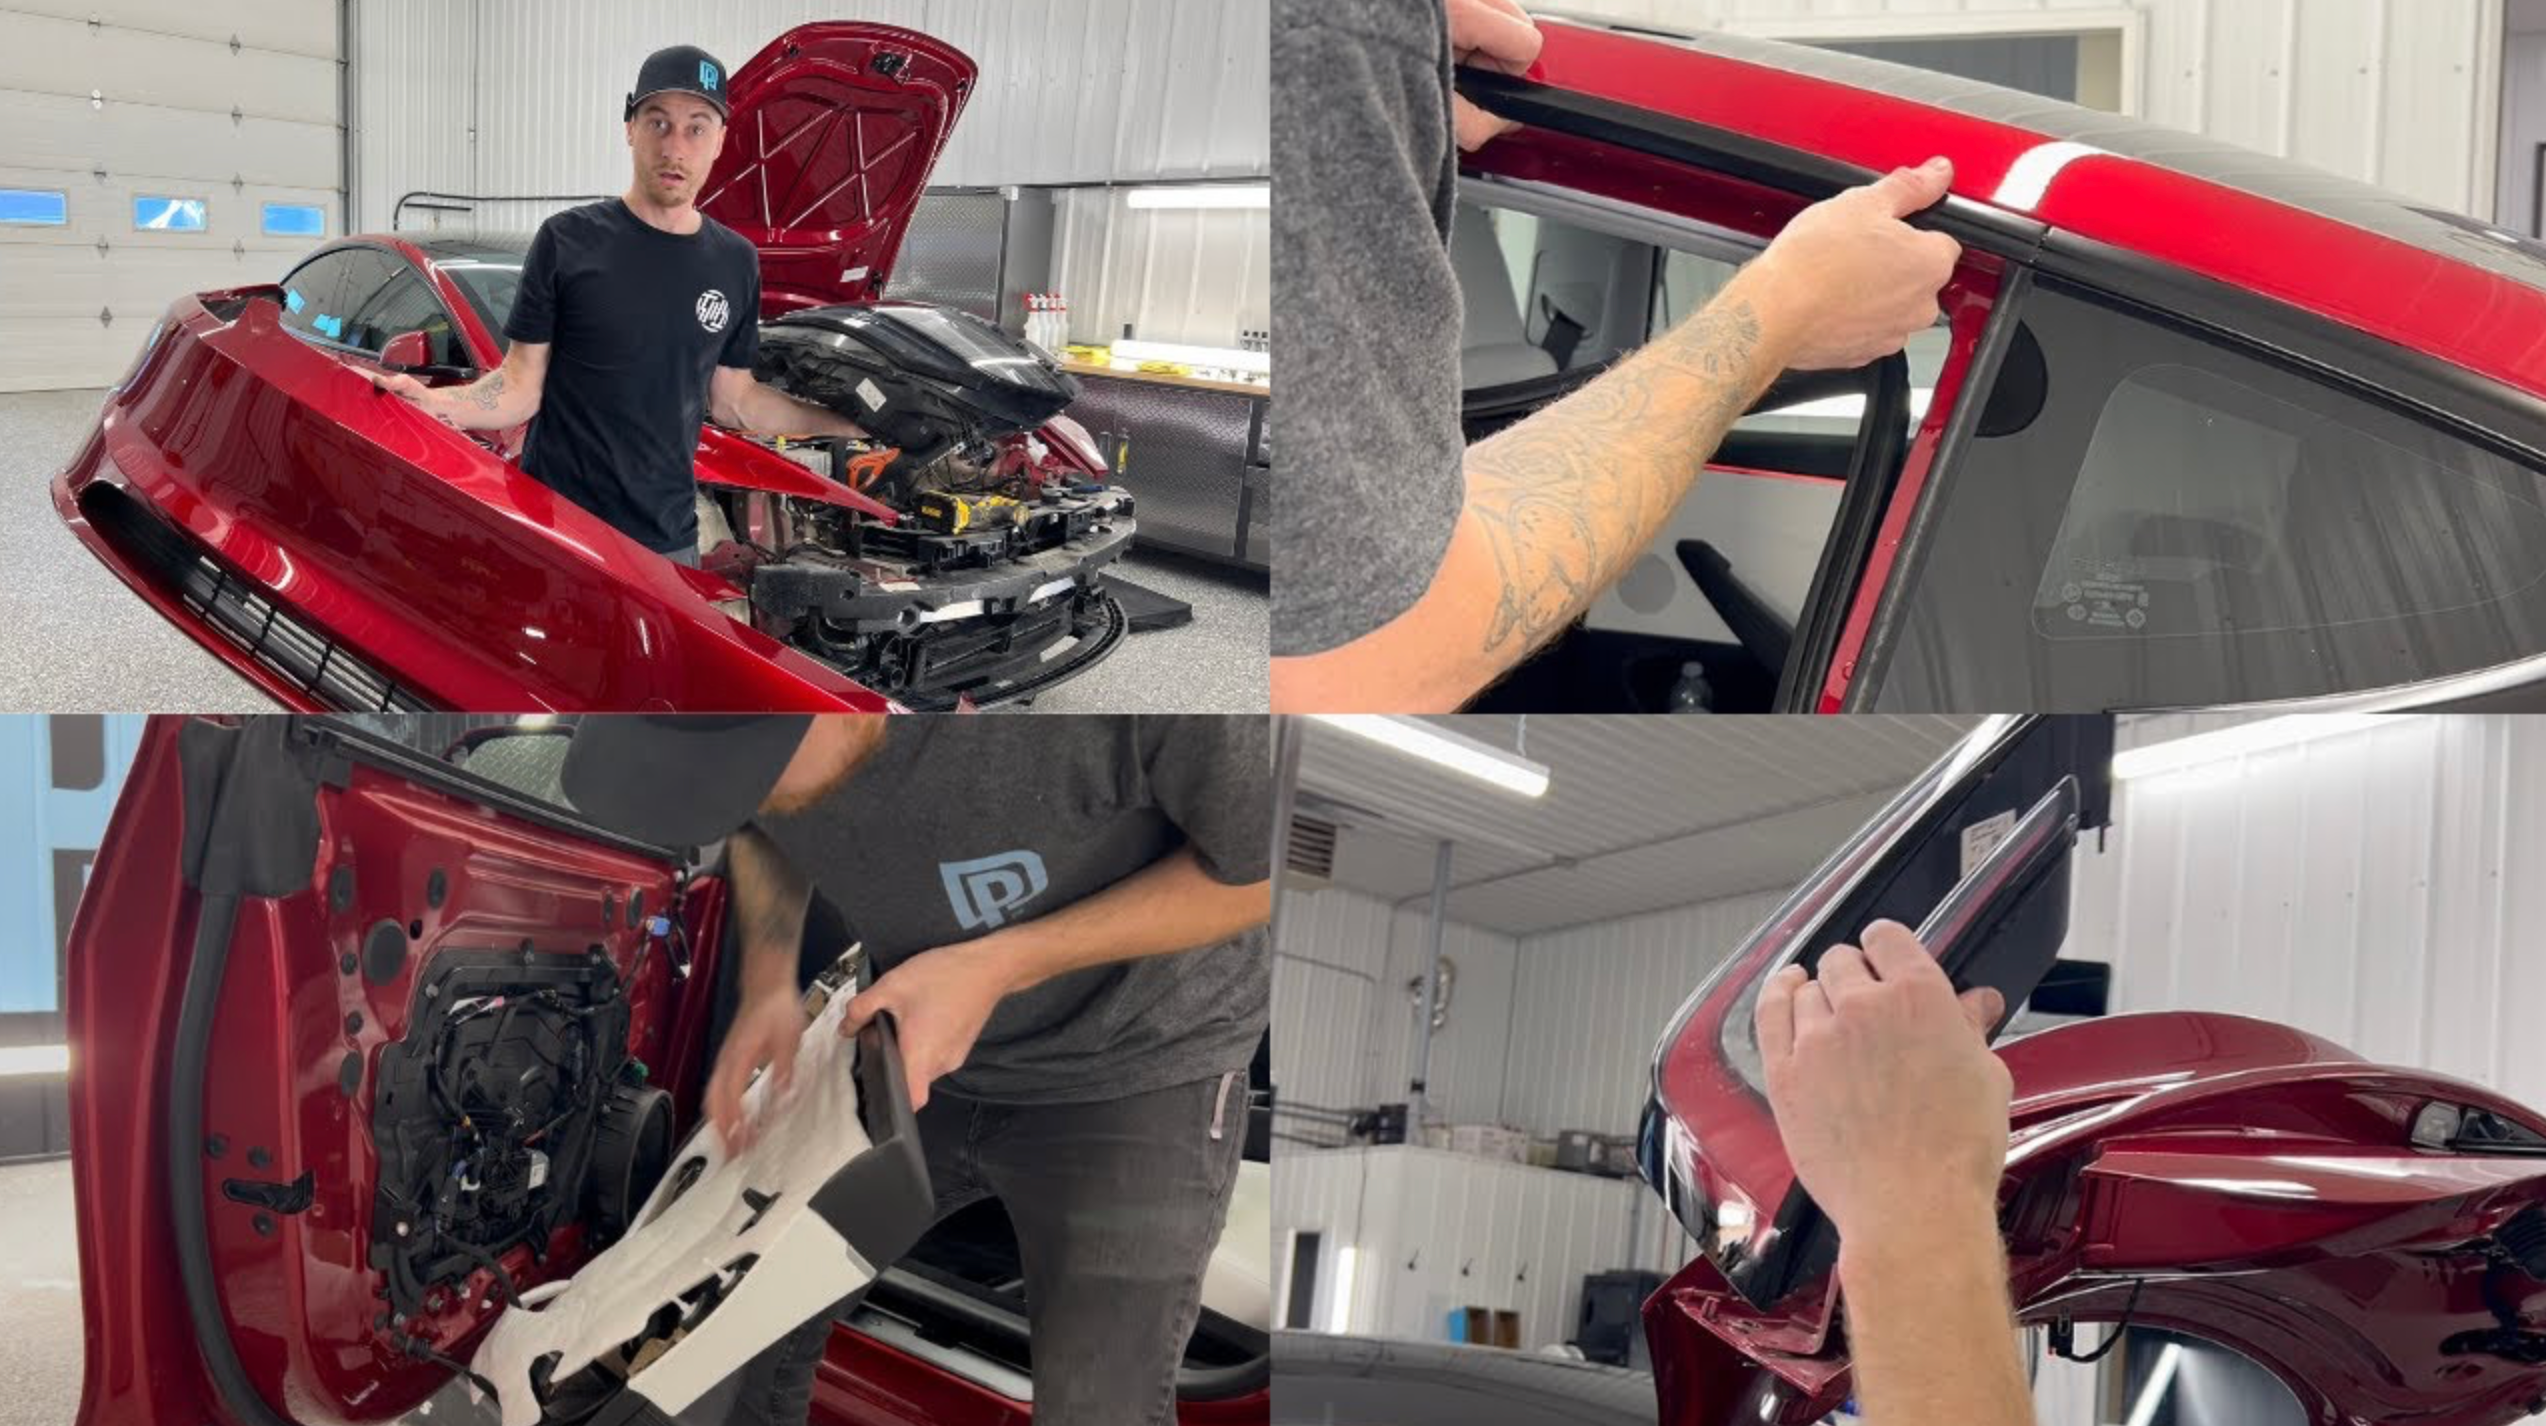
If you’re working on paint protection film (PPF), vinyl wrap, repairs, or custom modifications, knowing how to properly remove exterior panels on the Tesla Model 3 Highland will save you time, prevent damage, and make your job much cleaner.
This comprehensive guide walks you through removing:
-
Front bumper
-
Headlights
-
Door mirrors & inner door panel
-
Tail lights
-
A‑pillar / full pillar trim
-
Rear bumper
This process uses basic hand tools and is ideal for installers, DIYers, and Tesla owners.
Tools You'll Needs
-
10mm socket (ratchet recommended)
-
8mm socket
-
Torx bits (T20, T30)
-
Plastic pry tools
-
Flathead screwdriver (use carefully)
-
Pick tool
How to Remove the Front Bumper- Tesla Model 3 Highland
Step 1 - Open the Frunk & Remove Plastics
Open the frunk and remove the plastic covers. These panels are held in with clips and a combination of 10mm bolts, including two bolts located inside the frunk.
Step 2 - Disconnect Front Wiring Harness
Before removing the frunk tub, disconnect the wiring harness for the frunk light. Use a pick tool to gently lift the locking tab and release the connector.
Step 3 - Remove Frunk Tub Bolts
Once the harness is disconnected, remove the remaining 10mm bolts holding the frunk tub in place and set it aside.
Step 4 - Wheel Well & Underbody Fasteners
-
Remove plastic clips from both front wheel wells
-
Remove the 8mm bolt securing the bumper to the fender
-
Remove additional clips near the bumper edge
-
Remove the four 10mm bolts underneath the front bumper
Step 5 - Release the Bumper Clips
Carefully pull the bumper away from the fenders. The bumper is held on by tight clips—work slowly to avoid cracking tabs.
Disconnect the final wiring harness before fully removing the bumper and set it aside safely.
How to remove Headlights - Tesla Model 3 Highland
Each headlight is secured with:
-
Two 10mm bolts
-
One wiring harness behind the mounting bracket
Remove the bolts, gently pull the headlight forward, then disconnect the wiring harness. Slide the headlight straight out.
How to Remove the Inner Door Panel & Side Mirror
Step 1: Remove Door Panel Screws
-
Pry off the small light cover
-
Remove three Torx T30 bolts (one under the handle, two nearby)
Step 2: Release Door Panel Clips
Using a plastic pry tool, start at the edge and work your way around the panel to release the clips.
Step 3: Disconnect Wiring
-
Disconnect the door handle cable
-
Disconnect the wiring harness (red locking tab must be released first)
Lift the panel up and away from the door.
Step 4: Remove the Side Mirror
-
Peel back the rubber trim
-
Remove three 10mm bolts holding the mirror
-
Support the mirror while removing the final bolt
-
Feed the wiring through and remove the mirror
How to Remove Tail Lights - Tesla Model 3 Highland
Step 1: Remove Trunk Interior Panel
-
Remove plastic clips
-
Disconnect the trunk button wiring harness
Step 2: Disconnect Tail Light Wiring
Pull back the red locking tab and disconnect the harness.
Step 3: Remove Fasteners
-
Two 8mm bolts
-
One 8mm nut
Once removed, the tail light pulls straight out. Use a pry tool only if necessary.
How to Remove A‑Pillar / Full Pillar Trim
This step is highly recommended for wrap and PPF installs.
Steps:
-
Pull back the weather stripping
-
Remove the retaining clip with a pry tool
-
Pull the trim downward to release it
-
Remove the Torx screws securing the pillar trim
-
Slide the trim forward and off
This allows for clean wrapping underneath without tucking or contamination.
How to Remove the Rear Bumper – Tesla Model 3 Highland
Step 1: Upper Trim & Fender Area
-
Remove T20 plastic screws
-
Pull back weather stripping
-
Remove clips and 10mm bolts on both sides
Step 2: Wheel Well & Mud Flaps
-
Remove mud flaps if installed
-
Remove T20 screws inside the wheel well
Step 3: Underbody Fasteners
-
Remove multiple 10mm bolts underneath the bumper
Step 4: Release Side Retainers
Pull outward where the bumper meets the quarter panel to release it from the retainers.
Step 5: Disconnect Sensors & Wiring
Disconnect all wiring harnesses (look for red locking tabs).
Step 6: Release Bottom Tabs
Use a pry tool to lift the plastic tabs securing the bumper underneath. Support the bumper as it releases.
The rear bumper can now be removed safely.
Final Thoughts
Removing exterior panels on a Tesla Model 3 Highland is straightforward when you know where the fasteners and clips are. This process is perfect for:
-
Vinyl wraps
-
Paint protection film (PPF)
-
Body repairs
-
Custom modifications
Taking the time to remove panels properly saves hours of frustration and delivers a cleaner, more professional result.
If you found this guide helpful, consider bookmarking it or sharing it with another Tesla owner or installer.
Share:
How to Remove the Front Bumper and Headlights on a 2026 Tesla Model Y Juniper
2026 Tesla Model Y Stealth Gray Matte PPF Transformation – Defense+ PPF Install